Aviaxio Flight Timer
Instruction Manual
Getting Started
The first time you start Flight Timer, you will see a series of introductory screens telling you about the basics of the app. You can view these screens anytime by going to ...More → Introduction.
-
Menu & Alarm Notification
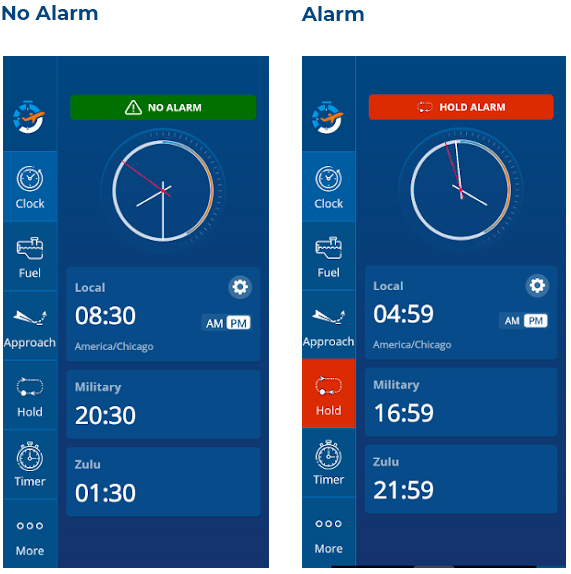
On the left side of every screen, you will see the menu, featuring buttons for Clock, Fuel, Approach, Hold, Timer, and More.
On the top of every screen, you will find the Alarm Notification. This will be green and say “NO ALARM” unless an alarm is sounding. When an alarm sounds, you will hear a buzzing noise and the Alarm Notification will tell you which alarm is going off. In addition, The menu button for that alarm will light up, making it easy to see which feature to go to in order to deal with the alarm.
-
Clock.
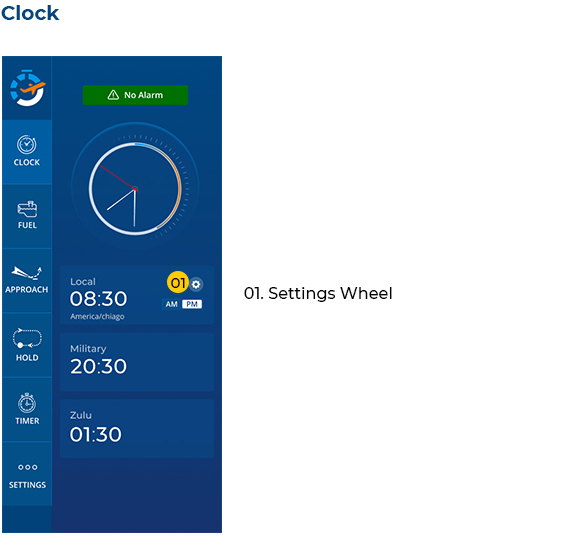
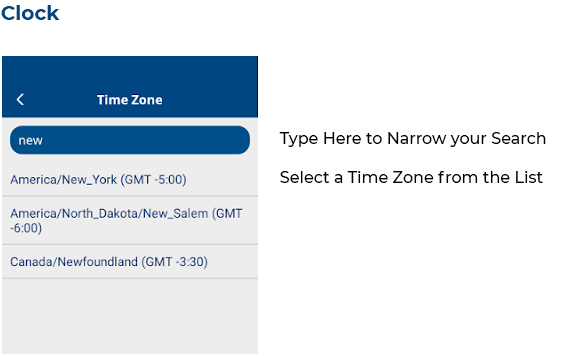
The Clock screen features Local time, Military time, and Zulu time. You can temporarily change the Local time to any time zone by clicking on the settings wheel. ⚙
-
Fuel Timer
This section has two timers: a fuel burn timer and a fuel tank switching timer.
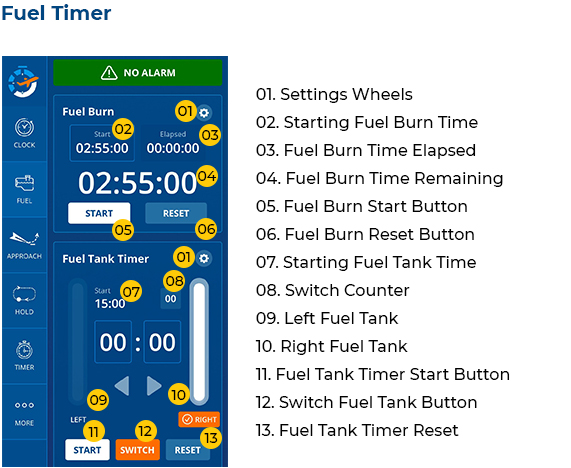
Set your Fuel Burn timer by clicking on the settings wheel next to Fuel Burn and click START to begin the countdown. The START button will switch to a PAUSE button. An alarm will sound when the timer runs out. Click RESET to start over.
Set your Fuel Tank Timer by clicking on the settings wheel next to it. You can select which tank to start with. Click START to begin countdown. The START button will switch to a PAUSE button. An alarm will sound when the timer runs out. Click SWITCH to change from one tank to the other. The timer will automatically start over on the other tank. Click RESET to start over.
-
Approach
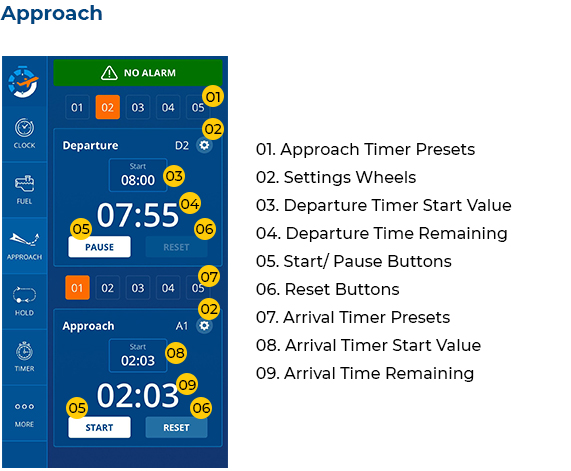
You can set multiple Approach timers for you Departure (or Home) and Arrival airports. You can set any number up to five timers for each.
- Click on the settings wheel next to the appropriate airport.
- Click on SET (01) TIME
- Repeat for as many Approach timers you need.
- Click on SET.
- Click on START. The START button will change to a PAUSE button. Click on RESET to start over.
-
Hold
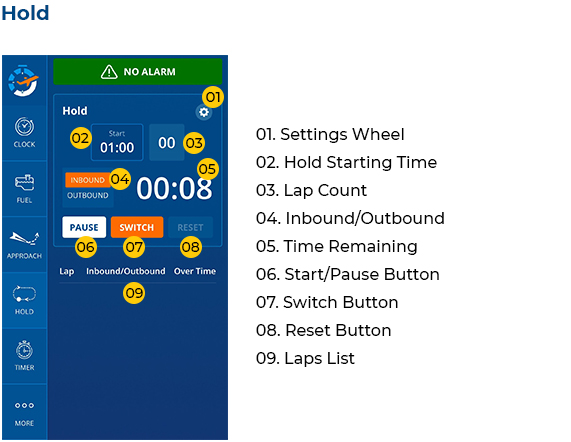
- Click on the settings wheel to set start time and choose INBOUND or OUTBOUND.
- Click on SET.
- Click on START to begin counting. START button will change to a PAUSE button. Click on SWITCH to change legs, or RESET to start over. You do not have to wait until the timer expires before switching.
- Flight Timer will display how many laps you’ve performed, along with any Over Time, to help you adjust your hold pattern.
-
Timer/Stopwatch
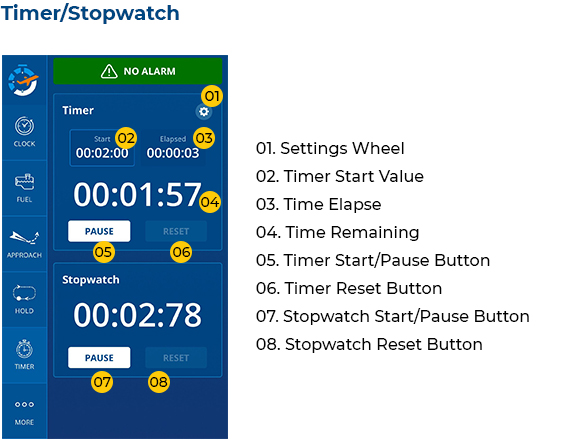
Use these as a general timer and stopwatch
Timer
- Click on settings wheel.
- Select the desired time.
- Click on SET.
- Click on START. The START button will change to a PAUSE button. Click on RESET to start over.
Stopwatch
- Click on START. The START button will change to a PAUSE button. Click on RESET to start over.
Article ID: 5, Created: August 25, 2021 at 4:16 AM, Modified: January 23, 2024 at 11:22 PM